If You’re Using Regular Ice in Your Cocktails, You’re Ruining Your Drink. Here’s How to Make Perfect Ice at Home.
A drink is as only as good as its ingredients and ice is a critical piece of cocktail perfection.
Excerpted from The Ice Book: Cool Cubes, Clear Spheres, and Other Chill Cocktail Crafts, by Camper English. Red Lightning Books, 2023. Reprinted with permission. Photo by Allison Webber.
The world’s best bartenders are as meticulous about their ice as they are their spirits: They invest thousands of dollars in Kold Draft ice machines that crank out perfect slow-melting cubes of ice that dilute and chill a drink just so without making it watery, they purchase slabs of ice that are perfectly transparent and impurity-free from specialized factories, and above all they never, ever, use ice that’s been sitting in a freezer next to a frozen pizza, half a pint of Ben and Jerry’s, and a freezer-burnt package of edamame off-gassing their aromas into said ice.
Excerpted from The Ice Book: Cool Cubes, Clear Spheres, and Other Chill Cocktail Crafts, by Camper English. Red Lightning Books, 2023. Reprinted with permission. Photo by Allison Webber.
For home bartenders who want to make the best possible (and most beautiful) ice, without buying much in the way of specialty equipment there is The Ice Book: Cool Cubes, Clear Spheres, and Other Chill Cocktail Crafts by Camper English ($19; Red Lightning Books), wherein the technique of directional freezing is taught and explored from every possible angle. Directional freezing, as the book explains, mimics how a pond or lake freezes so that “the ice tends to form in perfect clarity as it pushes trapped air and impurities away from the point of freezing.”
If you can master this in your freezer, you can create ice that is worthy of the finest boites from Tokyo to Sydney to Santa Barbara. In this excerpt, the basics are covered, but the book contains tricks and recipes to produce stunningly attractive drinks with striped ice, botanicals encased in ice, cocktails themselves suspended within ice spheres, branded and patterned ice, orchids and olives embedded in ice, and cocktails that change color over time thanks to, yes, the ice.
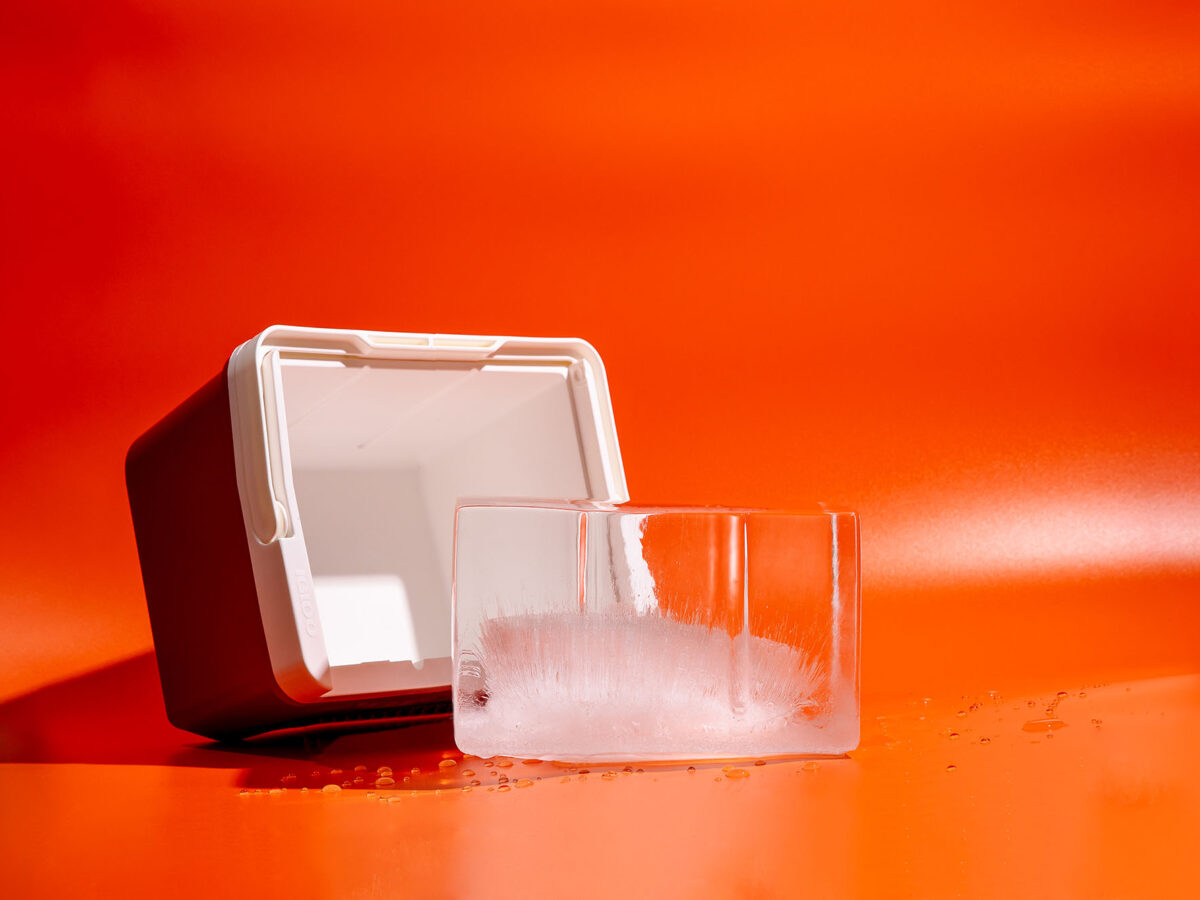
Make a Perfectly Clear Slab of Ice—the Everyday Way
Excerpted from The Ice Book: Cool Cubes, Clear Spheres, and Other Chill Cocktail Crafts, by Camper English. Red Lightning Books, 2023. Reprinted with permission. Photo by Allison Webber.
Here we make a completely clear slab of ice that can be cut up into cubes. Note that we only let it freeze long enough to make the clear section on top.
- Get an insulated container like a hard-sided cooler.
- Make space in your freezer.
- Fill the container with regular tap water. You don’t need to fill it all the way up.
- Place the container in the freezer with the top off.
- After about two days, remove the cooler from the freezer. Tip it over and wait for the ice block to slide out. As it does, the unfrozen water in the bottom will splash out, so be sure you’re doing this in the sink or somewhere that can get wet.
- Cut your slab into cubes and other shapes.
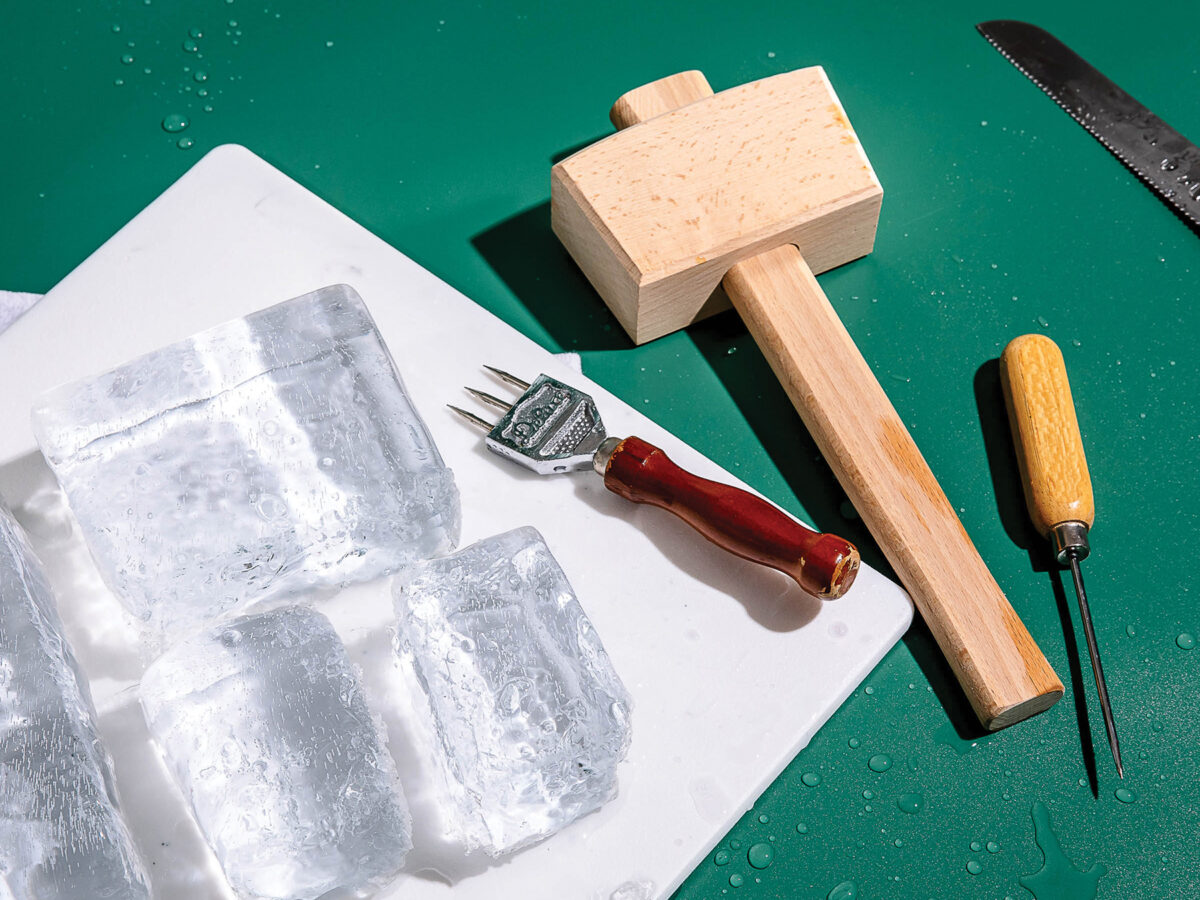
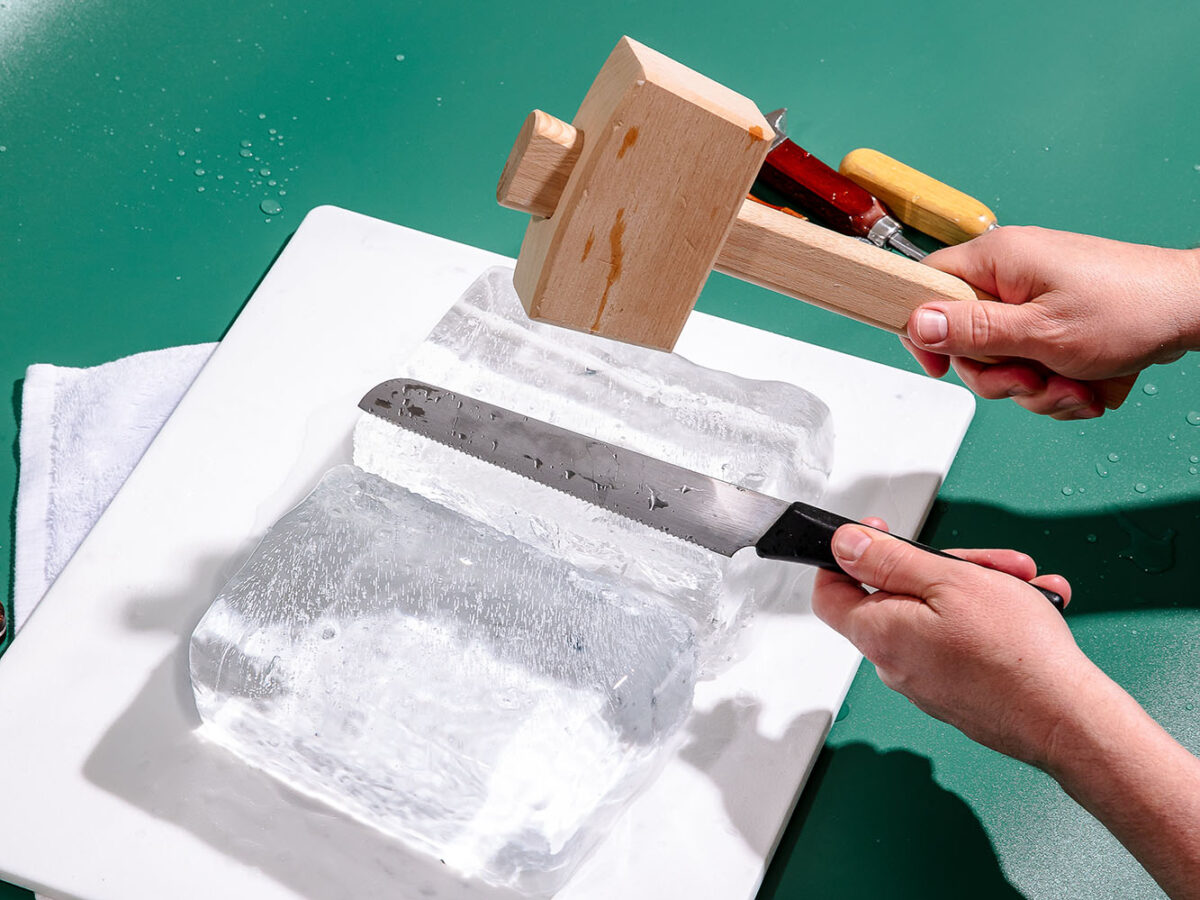
How to Cut up an Ice Slab
Excerpted from The Ice Book: Cool Cubes, Clear Spheres, and Other Chill Cocktail Crafts, by Camper English. Red Lightning Books, 2023. Reprinted with permission. Photo by Allison Webber.
Think of this as an essential technique for a master mixologist, like breaking down a chicken is for a chef.
- Set the slab on a wood or plastic cutting board rather than right against your countertop. The cutting board provides a little cushioning.
- Score a line across the top of the slab with your saw, knife, or ice pick. For a slab of only a few inches (5 cm) thick, your line only needs to be about one-eighth of an inch (one-half cm) deep. For a thicker slab, you might want to go deeper.
- If the slab is more than about 6 inches (15 cm) thick, turn the block and continue to score the line around the sides and also the bottom so that all the lines connect.
- Set the knife into the groove of the scored line, or the ice pick in the middle of it, and give it a tap with something: a muddler, a hammer, the back of an ice pick, a block of wood, etc. Hopefully the block will split directly in half.
- Repeat the process, splitting each piece of ice in the middle until you have a cube (or a longer spear). I find that it is easier to split ice from the middle each time rather than trying to cut off the side.
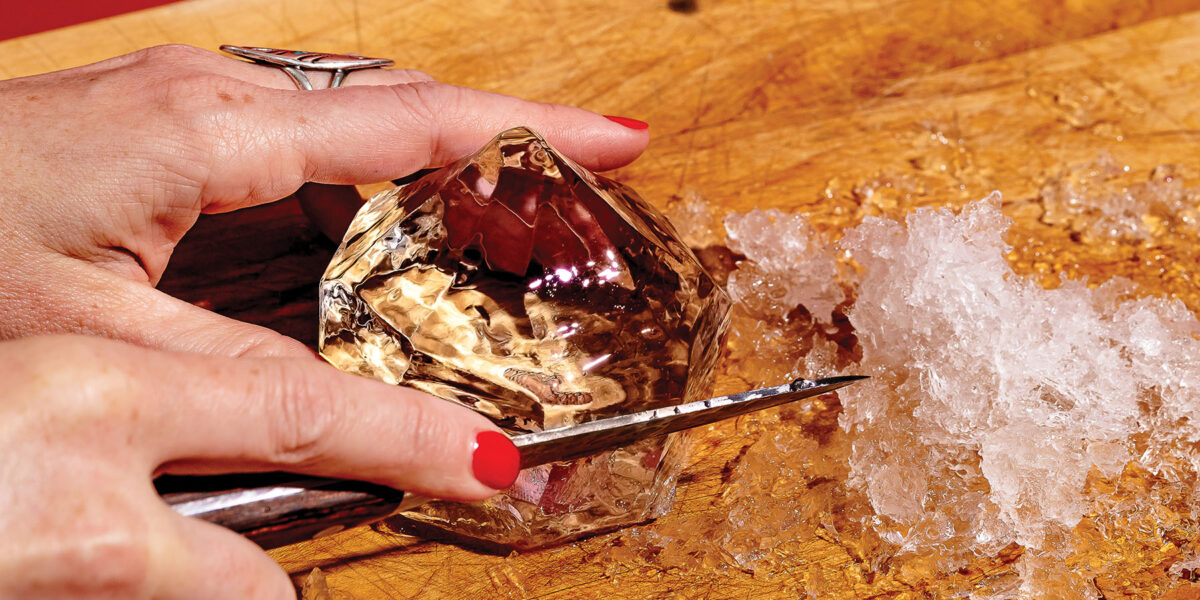
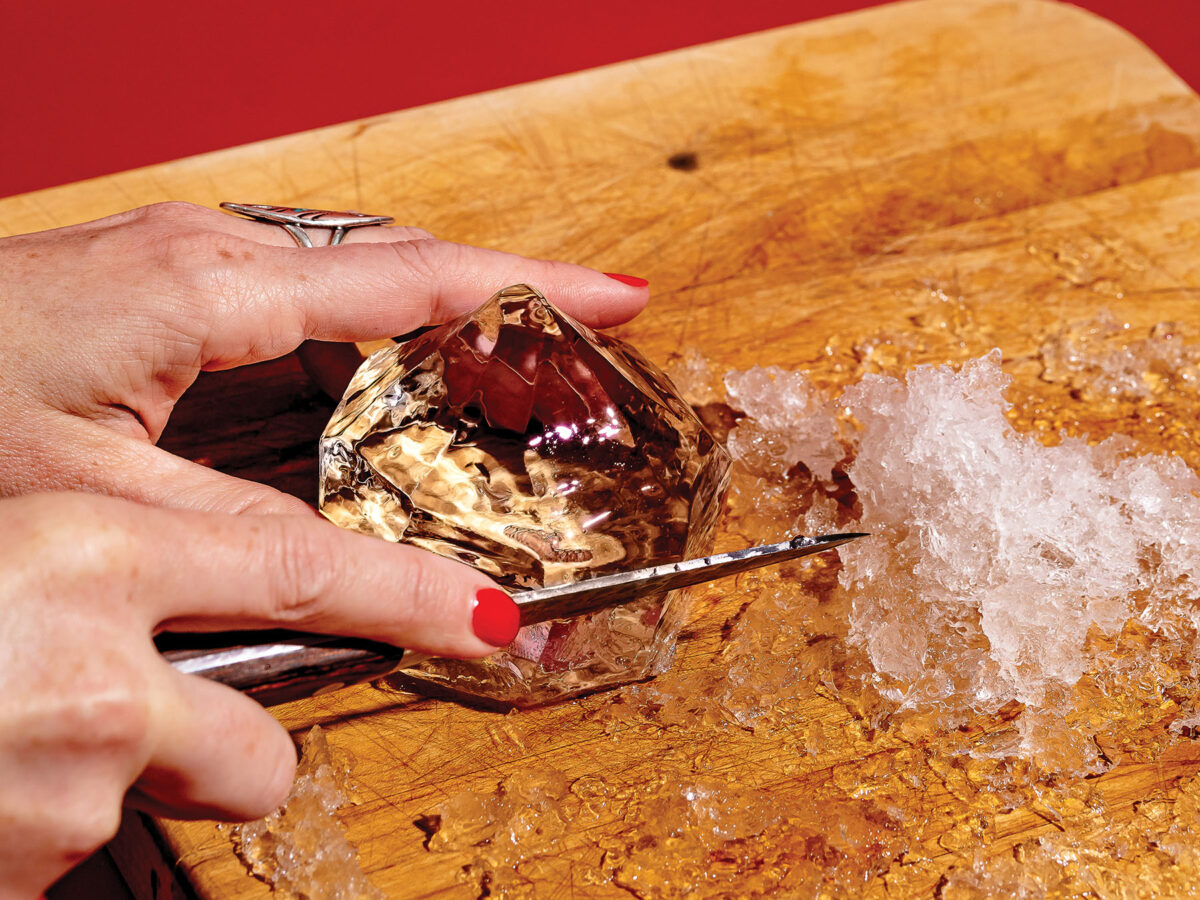
How to Carve an Ice Diamond
Excerpted from The Ice Book: Cool Cubes, Clear Spheres, and Other Chill Cocktail Crafts, by Camper English. Red Lightning Books, 2023. Reprinted with permission. Photo by Allison Webber.
This method was refined in the top bars of Tokyo before taking off worldwide. It’s a stunning way to serve exceptional single malt or bourbon on ice.
- Place the cube on a cutting board or other non-slip surface. Be sure to hold the cube steady while making cuts.
- Place the blade of the knife on one edge of the cube, about a third of the way down from the top. Cut down at an angle (roughly 45 degrees) in toward the bottom center of the cube where the long pointy end of the diamond will be. You probably won’t be able to cut all the way to the center at that angle in one slice, which is fine. You can shave it down to refine it later.
- Repeat the first cut for all four side edges.
- On one of the flat sides of the cube (the only remaining flat part will be at the top), place your blade a third of the way from the top, connecting the imaginary line between two edge cuts you just made. Cut downward at the same angle toward the bottom center point.
- Repeat this second cut on all four sides.
- After these first eight cuts, you’ll have the stubby bottom half of a diamond. You can refine those cuts into a sharper diamond point now or later. Flip the ice cube over.
- You’re now working on the wide, flatter top part of the diamond. That flat top is on the bottom against your cutting board. On the bottom uncut portion of the cube, align your knife to match the very first cut you made on an edge. But instead of cutting down inward at an angle, make this cut straight down.
- Repeat this cut on all four edges.
- Now match the second set of cuts: Start at the bottom sides and cut down—at an angle again rather than straight down—to make bevels.
- Repeat for all four sides.
- You’ll now have a stubby diamond. Go over the previous cuts to sharpen it up and make it thinner if desired. Fix yourself a drink when you’re finished!
Get the Book
Excerpted from The Ice Book: Cool Cubes, Clear Spheres, and Other Chill Cocktail Crafts, by Camper English. Red Lightning Books, 2023. Reprinted with permission. Photo by Allison Webber.